


After my last post talking about revisions to the gazebo and the pavilion, I needed to take a look at the benches and picnic tables scattered around the island.
Now there were two bench prefabs in the project when I started. There was this

and this

Eric suggested I take one of the benches, figure out a new texturing scheme, and create several variants based off of that. I imported the first bench into Blender and looked at its UV map.
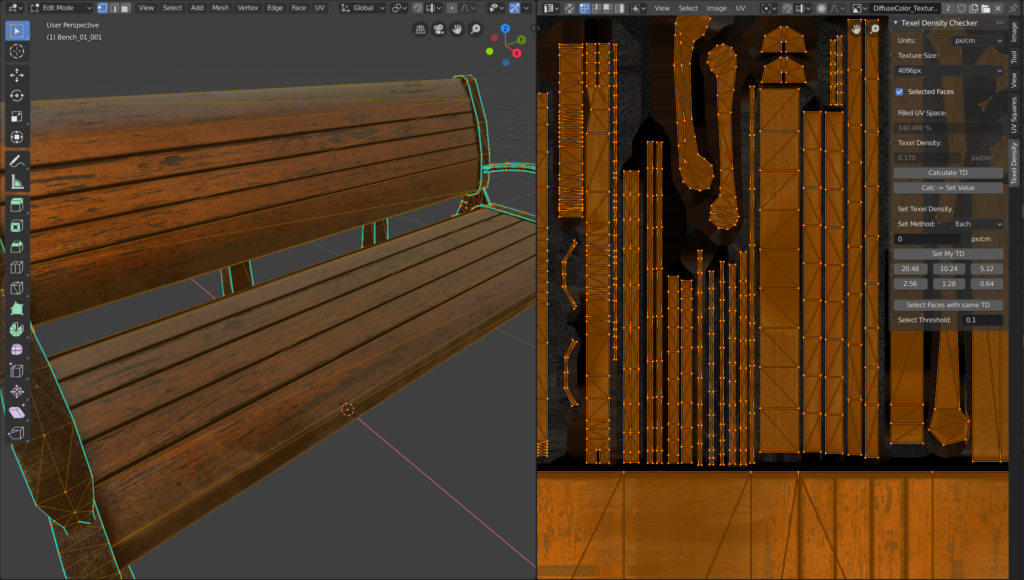
This asset had a single UV atlas with one material, and all of the geometry mapped to different parts, so there is a section for the wooden boards, and a section for the cast iron. That’s fine, but look at the dropdown menu titled “Texel Density Checker” in the upper right hand corner. This is an awesome plugin by Ivan Vostrikov that you can get on Gumroad.
For those of you who don’t know 3D art very well, texel density is a measure of how many pixels on the 2D texture in the right-hand window fit per 3D measurement unit on the object. As shown above, a texel density of 0.170 px/cm means only 0.170 pixels from the 2D texture on the right show up on every centimeter on the model on the left. This number depends on the resolution of the 2D atlas, so a 4K texture will produce a higher texel density than a 2K atlas. The higher the texel density, the more detailed the model can look, because there will be more pixels per centimeter on the model.
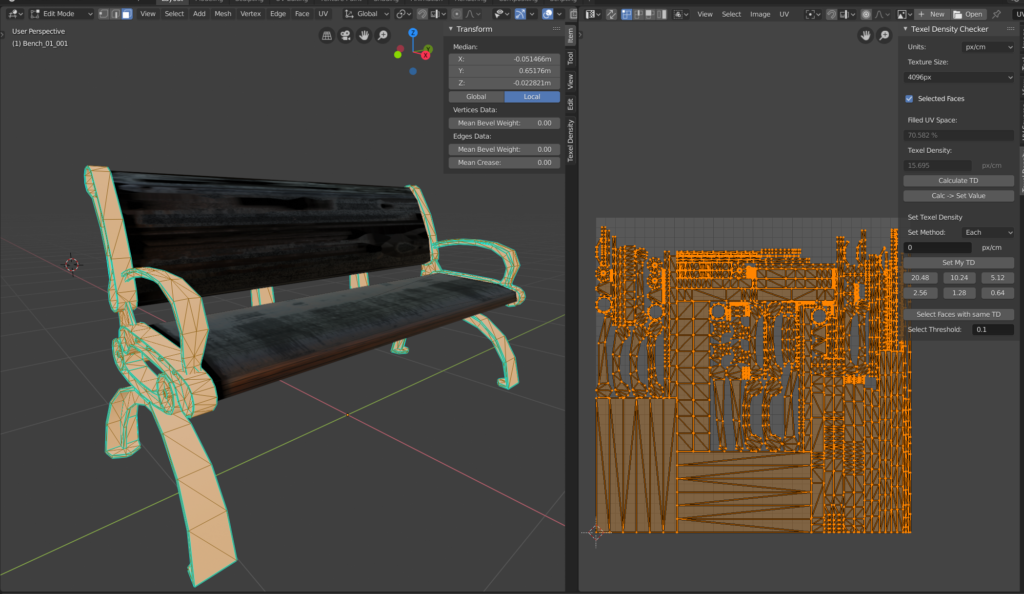
One of the most agonizing aspects of remodeling the pavilion model in the last blog post was re-mapping the model in such a way that I could get an acceptable texel density, and at the same time I had to figure out a guideline for acceptable texel density. Fortunately, I stumbled across Leonardo Iezzi’s Artstation infographics on the subject, and generally speaking I aim for around 5 px/cm. By breaking the model up into two materials, I could achieve a new density of 15 px/cm for a 4K texture:
When I brought the bench in to Substance Painter, again it was Substance Share (SP 1 Old Painted Planks) to the rescue!

The customizable paint color and weathering pattern really came in handy. I could very quickly generate a variety of paint colors and weathering and export them to Unity.

Then we got around to importing this thing into the main scene, with one hitch:
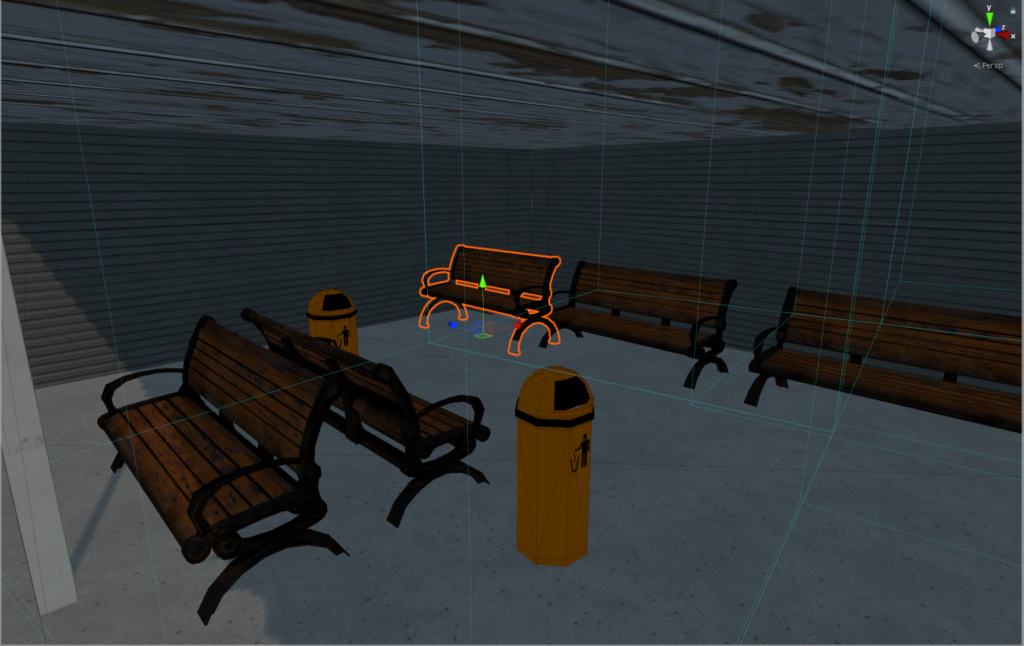
Putting the weathered benches here doesn’t make a lot of sense, because these benches are farther out of the wind/rain and wouldn’t wear this much. The other bench prefab that I screenshotted way back in this post, however, is not. So I replaced all of the benches in this area with the other prefab and started replacing the other benches around the island with mine. Let’s talk about picnic tables next. This is how it looked in Blender to begin with:
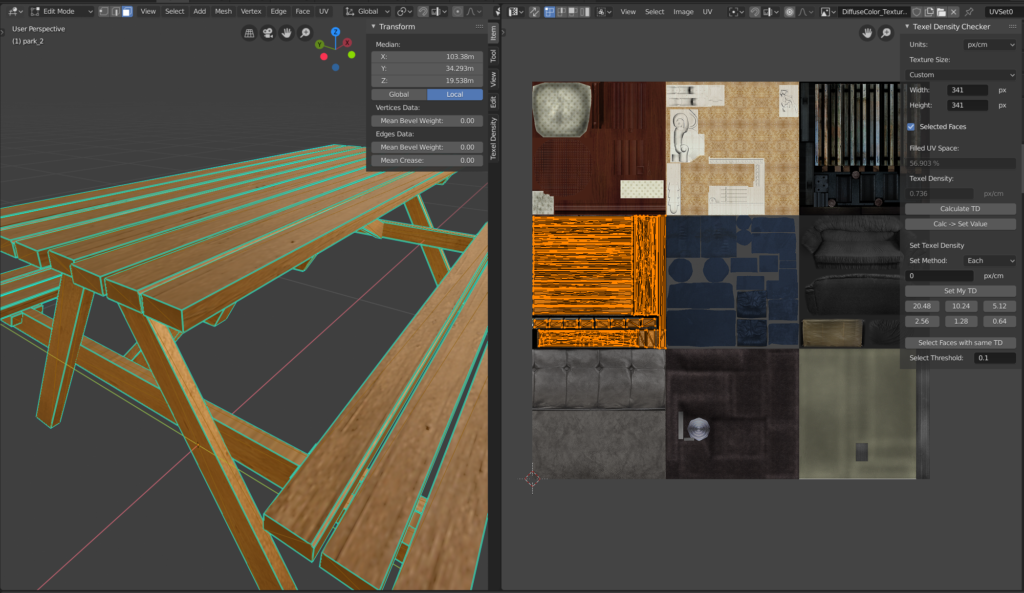
Ohhh man, this setup is so early 00s my phone turned into a fliphone. When did I get frosted tips?! Sarcasm aside, this UV mapping did a little trick to avoid the old seam problem by photosourcing the side of several wood boards and mapping to the sides of the boards on the model. That’s fine, but useless if I need to put a whole new texture atlas it, and boy did I ever. The texture atlas to the right is 1024×1024, and the section of it concerned with the table is only 341×341. This gives it a texel density of 0.736 px/cm! Furthermore, let’s take another look at that reference picture I concluded the last blog post with:
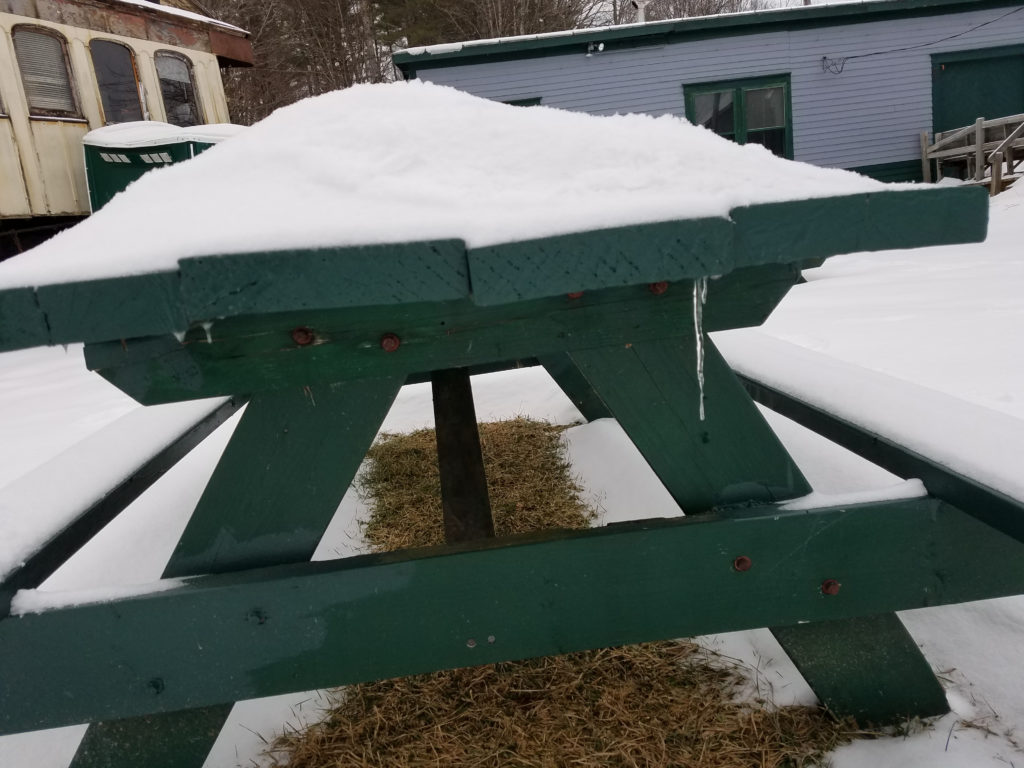
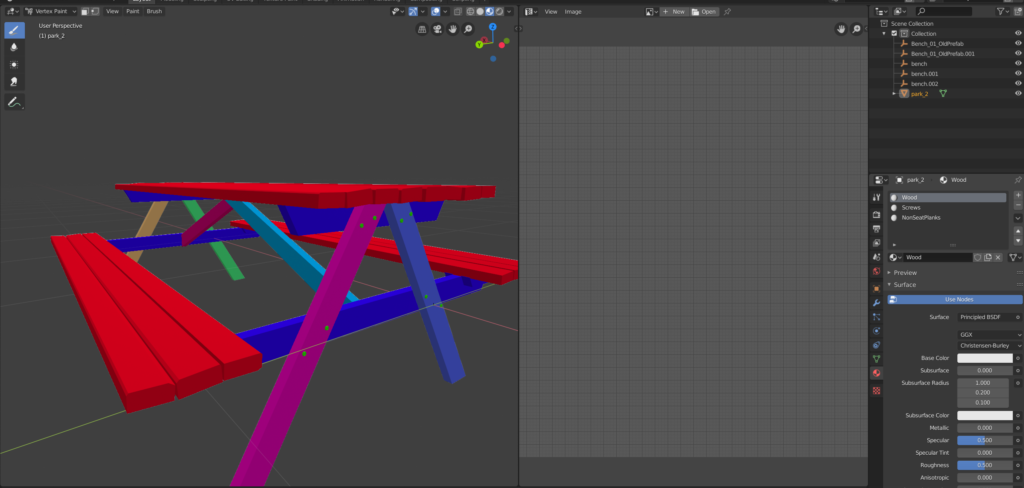
Note how the boards on the table are not straight, and there are some rusty old screws in the side. The original picnic table model did have slightly uneven boards, but I wanted to make them a little more disorderly. I then added a few makeshift screws to approximately the same areas in the reference photo. Now let’s talk about the vertex painting I had to do. First, here’s the vertex painting in Blender:
and here’s the model in Substance Painter after I added the default Wood Rough texture that ships with Painter:

Why did I use so many colors in the vertex painting? So I could set a rotation for each supporting board on the bench. If somebody cut these boards against the grain, they wouldn’t have any strength. I needed to rotate the texture on each leg so that it would look like a realistic cut. Those of you who do woodworking might wonder why there aren’t screws keeping the seat and joining boards together. At first it was an oversight, but I figured that a skilled enough carpenter (the kind of skilled carpenter you can find in Maine where so much of our economy relies on trades rather than, say, 3D environment art) could probably drill up from the joining board into the seat board without going through, so I ran with that.
Here’s a nice in-editor shot to close out the blog post, with the new picnic table, the new gazebo a little farther away, and off in the distance the waiting area with the new benches. I’ll have another post sooner than you might think covering the new changes to the houses and other buildings in the downtown part of the island.
